
Once I figured out that I needed a new Voltage
Regulator/Rectifier for Oldbike the first thing that I did was call a local
shop have I had been mentioning in a few of my past posts to see what they had
available. They informed me that they
did not have any used Voltage Regulator/Rectifiers available and the new ones
that they had were $100. After I called
them I checked with a local motorcycle bone yard that I have been going to for
parts, they told me that they had used ones for $45 and non OEM one for $100
(after testing their used ones I wasn’t able to get one to give me a good test
to that option was out). The next place
I went to was another local shop that is doing their best to stay afloat and in
the last few years hasn’t been carrying too much in stock and mostly order odd
parts, so of course they didn’t have the part in stock but they were able to
order the same non OEM Voltage Regulator/Rectifier for $79, so far that was
looking like the deal to go with.
Until I went to an site tied strongly with GS Resources, BikeCliff’s Website. He had the eventual solution I went with laid
right out there for me. He had a list
of other manufacturer’s compatible Voltage Regulator Rectifiers, a tutorial
on how
to modify them for use on the Suzuki GS and even a tutorial
on how to install them! Using all
this valuable information I found a used Voltage Regulator/Rectifier for a 1979
Honda Goldwing that would bolt right and work perfectly with a little wiring
work. I got it off eBay already tested
good from a power seller (shipped) for $24.
For that price it was worth the risk of getting a bad one and the wait
for it to get there.
Amazingly it arrived in two days!

You can see (above) there is a size difference between the
two (more surface area = more heat dissipation capability) but importantly the
spacing between the two mounting holes and the size are exactly the same. My came plan was to cut the wires off my old
Voltage Regulator/Rectifier and re-use the stock bullet connectors. Some people go through an extra step of
putting new connectors on, I think that if you clean up the contact points and you
get a good continuity test what does it matter? Electricity doesn’t care how
old your connectors are. Also, my soldering
skills aren’t the best so I figured the less soldering I do on the bike the
better. The first thing I had to do was
to get the Honda plugs off of the new (to me) Voltage Regulator/Rectifier. Really I could have just cut the wires but I
figured that some people might wonder how to get them off without cutting. Basically you just something narrow enough
but stiff enough to jam down into the end of the plug, below I am using a
cotter pin, I have tons of them in my odds ‘n ends toolbox.

All you need to do is press your tool of choice where the
notch is in the connector, that will press in the little tab that keeps the
plug from pulling out of the connector and you can slide it right out. Just like that you’re connectors are out!

Then I went ahead and cut them off anyhow!

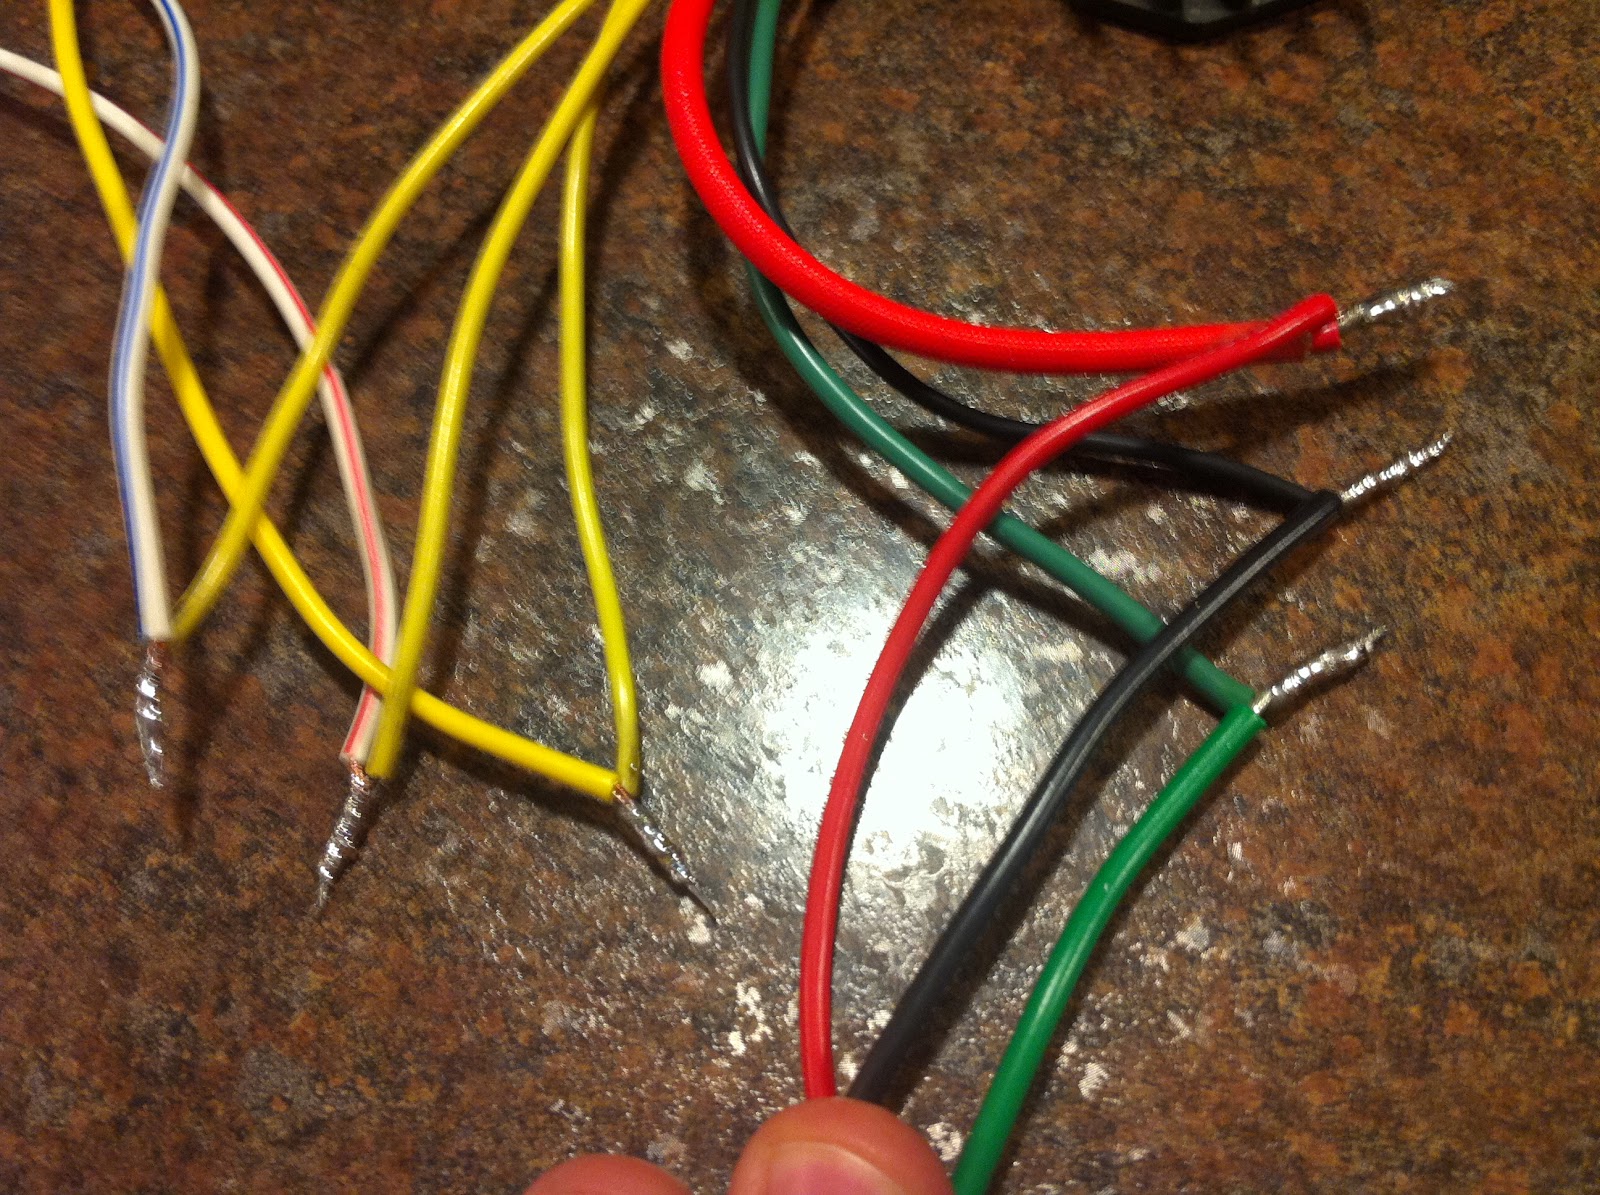
I cut all the connectors off the old Voltage
Regulator/Rectifier, stripped the shielding back and soldered them to the corresponding
wires on the new Voltage Regulator/Rectifier.

On the Honda the tree phases are all yellow, so you can pick
and choose whatever of the GS phase colors (yellow, white/red, white/blue) go
onto what yellow wire, electrically it doesn’t matter which one. Another difference is that on the Honda part
the ground wire is green NOT BLACK. The
black wire on the Honda part is a sensing wire, this can be connected to any
wire that is always on when the bike ignition is in the on position. The reason that it needs to be that way is
that the sense wire tells the Voltage Regulator/Rectifier what the system
voltage is at any given time, so if the bike start’s putting too high of a voltage
into the electrical system the sense wire tells the Voltage Regulator/Rectifier
and it lowers the voltage coming out of it.
I also have a ton of different colored wire of different
gauges in my odds ‘n ends toolbox. And being
that I was going to be running the (green) ground to the negative post of the
battery rather than to a common ground (the frame) I soldered in a length of
green wire more than sufficient enough to get the batter which I would trim
once I had the Voltage Regulator/Rectifier installed onto the bike. I did the same with the black (sense) wire.

After all the soldering was done I took everything to the
bike and mounted it on there.

I made a video walking you through what I did which you can
watch below.
All that was left to do was to test it you can see how that
goes in the video below.
I have ridden it a few times since then and so far the
highest voltage I have seen is a peak of 14.8V and with the bike warm and the
battery fully charged it will put out around 13.0Vat idle I would say that is
acceptable to me! Of course time will tell how this used part holds up
hopefully it doesn’t burn up in a week and I feel dumb for not spending the $79
on a brand new non-OEM one!
Thanks to all who view this blog! Stay tuned for my next post where I try to
take Oldbike to the Slimey Crud Run next weekend. If you don’t know what that is you can check the
link!
Just found your blog. Read the entire thing front to back. So much great information! I was thinking of picking up a '79 gs425 from craigslist and basically do the same thing you are doing! I look forward to your posts in the future!
ReplyDeleteGlad you foung the blog and even more glad that you found it useful. I've been pretty happy with the bike/project so far. Post back if you end up getting the GS!
DeleteThe explanation of how to wire it was very useful. Thanks.
ReplyDelete