Sunday, December 11, 2011

Saying Goodbye to the Lollipops Part 1


A while ago I stated that I wanted to clean up the look of the turn signals on the bike.  I knew that I wanted to re-use the original signals and shorten the ridiculously long stalks that Suzuki deemed necessary.  The main reason for keeping the original turn signals is primarily a financial one and secondarily a cosmetic one.  I really can’t think of any new aftermarket turn signals that would blend with the looks of my 32 year old bike so combining that with the extra cost involved, I set about modifying the stalks to make them shorter.


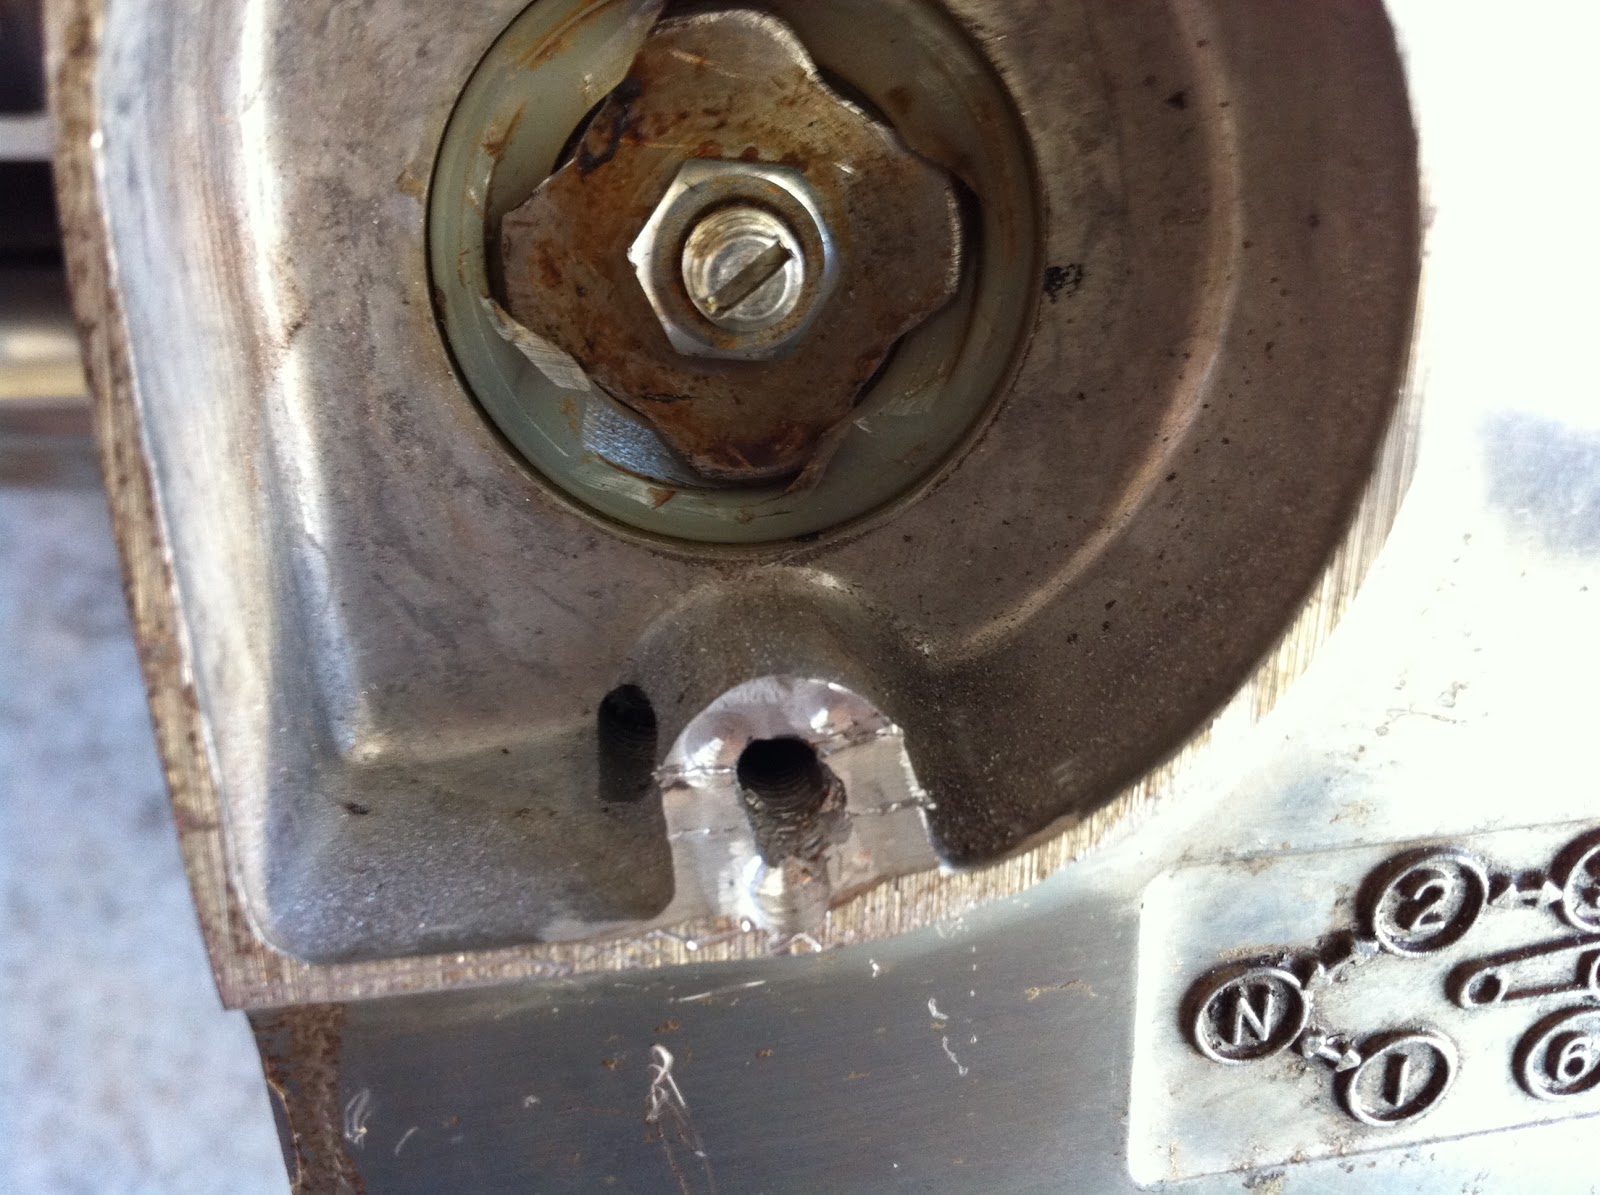
I had hoped that I would be able to have my machinist friend shorten up the original stalks and re-thread them but he stated that it would be too much work so my next plan was to find shorter bolts in the same diameter and thread pitch (M10 X 1.25) and have him drill out the centers which he found to be more agreeable.

After he drilled out the centers, all I had to do was hack-saw off the heads and grind a bevel on the cut end.

These obviously, are much shorter than the original stalks.

I did add a nut to each signal to act as a small spacer to make sure that there was no contact between the turn signal and the headlight mounting bracket.

I had to cut the connector on the positive lead off to get the wire out of the stalks since they were put on after the wire was run through the stalk and the connector was a larger diameter than the wire itself.  Consequently then I had to re-solder the wire together.


That was a pretty simple task and as I am typing this I am realizing that I used black electrical tape to cover the soldered bits when I actually have shrink tubing and a heat gun, so I will have to go back and re-do the job properly later.

I was only able to get the front signals mounted as the rear signals were originally mounted to the luggage rack-type thing which I removed.  My plan is to drill mounting holes in the rear fender and mount the turn signal directly to that.


I am really happy with the results on the front  and am sure that I will be happy with the rear as well once they are mounted but I will need to do some searching for a tail-light smaller than the original but bigger than the smaller one I had found on side of the road, proportion will be key.


That’s it for now, thanks for reading, and look forward to some more turn signal work next time and I will be working on finding parts for the intake leaks on the engine as well.

Tuesday, November 22, 2011

Losing the Gigantic Taillight


It has been a while since I have worked on oldbike, and this last Sunday I decided to at least give “the ball” a little nudge to start it rolling again.  I have heard it said about any project that the trick to finishing it is to do at least one little thing related to the project once a week.  I let myself fall off that wagon a bit.  Of course marital, domestic, family, and social obligations will take precedence to the work on oldbike (and they have) but there have been times where I could have popped out for a bit and didn’t.  I guess I would say that I was a little burned out on the project.  I have gotten past the desire to make this into a CafĂ© racer per-se and am firmly focused on tailoring this bike to my needs not anyone’s preconceived notions of what it should be.  Right now my vision is (and I think I’ve said it before) an urban assault/commuter geared for quick acceleration probably with a top speed of around 70-80mph perhaps with some sort of 0n/off road tires if the make them and for some reason I want to be able to ride the things down some stairs…
I took aim at the most glaringly ugly thing on the bike to me, the huge tail light… it had to go.  Really all it took was a 10mm socket and a wrench for the three nuts that hold the light riser to the fender and a flat head screw driver to loosen the wire looms that run under the rear fender to get the thing off.

Once I had it off I had to take a peek inside the lens just out of curiosity and it is amazing how pristine the inside of the taillight was!  I am sure that it is exactly the same as it looked on the day the bike was assembled 31 years ago!


Once off, the rear end of the bike looked so much more spritely and light!


Things to come for the winter will be a search for new gaskets and boots for the carbs and intake, perhaps a teardown of the engine after that if the new boots and gaskets fix the warm idling issue to remove a broken bolt for the cam chain tensioner and re-gasketing the engine.  I still need to manufacture some seat mounting hardware to match the mounting points on the oldbike and once I do I would like to lose those taillight/luggage rack mount points and weld in a seat-look to match the contours of the rear of the seat.  And with respect to the fenders I had originally planned on trimming them but if this is going to be a true commuter bike the full fenders would be nice for the inevitable rain I’ll end up in.  I will repaint the gas tank this winter too but I kind of like the chrome on the fenders so those will get a little cleaning and that will be it.  The headers and mufflers are ugly; I’ll have to decide what to do about that.  As I sit here typing the list keeps getting longer! I would like to have the thing road-worthy by spring as a time table.


I am thinking of giving this little taillight lens that I found (literally) on the side of a road while on a run, a try, though the only issue is that if I plan on keeping the stock turn signals this might be a little small.  I might have to keep looking for something more balanced.


So yeah… I didn’t do a whole lot of work for this post but I need to get started somewhere and hopefully this little nugget will be the just the nudge I need to get the project rolling again.

Thanks of course for reading!

Tuesday, November 1, 2011

Just Filler Really...

I haven't been able to do a lot of work on the GS project as of late, no excuses, just a gaurantee that as things settle into the slow cold winter that I will be out in the garage dutifully working away on the GS and thus generating more content for this blog.

For those who have been checking back loyally here is a little video I made when I decided to see what both of my bikes sounded like when they were both running at the same time.


I liked it...

More to come I promise!

Wednesday, August 31, 2011

Mufflers Properly Reinstalled


As I have mentioned in previous posts the bike with open headers is just way too loud.  The previous owner had ditched the stock mufflers for a set of stock Harley Davidson Sportster mufflers.  The problem with this is that the Sportster muffler's outside diameter is 1 7/8" and the headers outside diameter is 1 1/2" the problems is that the size differences are so much that the clamps will not allow the muffler sleeve to clamp all the way down on the header.  As stated in my blog summary there isn't a lot of money to be spent on the project so my first attempt at resolving this issue was the cheapest.

After some shopping around I found some automotive exhaust reducers that would work for my purposes.  The reducers are standard a galvanized exhaust pipe with a 1 5/8"inside diameter on one end and a 1 7/8"inside diameter on the other.  So I picked up two of those and four sets of clamps to hold them the whole works together.


The smaller end of the reducer wasn't exactly a correct fit so I did a four-way cut on the smaller end with my hacksaw to allow the clamps to squeeze down the small end of the reducer to fit the header pipe.  Here's a look at the rig I used to hold the pipe while I cut it.


Here is a look at the completed reducer.


Here is how the joints between the muffler and the header looked when it is done.


The main idea here was to eliminate the leaks in the exhaust and quiet down the bike and this seemed to do the job.  Check out the video below to see some more tinkering.


That's all I have for now.  It might be a little while before another update as starting this Thursday I will be working 12 hour shifts for the next 8 days :-(


Wednesday, August 17, 2011

First Ride on the GS


One of my best friends got married on Saturday, a great couple, a great day and a great party.  Even through the post alcoholic haze from the night before I was able to get some work done on the bike this Sunday.  Mostly in the form of getting the stuck EZ-out out of the counter shaft sprocket cover and then getting the bike back together and taking it for a short shakedown ride.
First, I tried to drill around the EZ-out fastener managing to break two 1/16” drill bits in the process finally I just chiseled out the aluminum to a point where The EZ-out and the fastener came out.  I might still have enough “meat” left in the non-chiseled portion to put a longer threaded fastener in ot drill and tap for a longer fastener.


On the opposite side of the cover is the mechanism that depresses the clutch rod.


Once that was back in I had the bike in together enough of a stat that I shakedown ride was possible.  Keeping in mind that the bike isn’t titled yet I took it for a ¾ mile run to the gas station.  Some issues arose once I the bike got up to temp it had some issues maintaining idle speed on the way back and would die if I didn’t give it a little extra gas.  I am going to have to look into getting new carb boots and spacer gaskets to make sure that there are no air leaks on the intake side.  Also with the stock jetting it is probably running lean without the mufflers, not to mention that the thing is too effing loud!  All things that I will need to address but it was still good to get it on the road!


Tuesday, August 2, 2011

New (Old) Carbs In and She Runs!

Halfway through July I finally made it out my local motorcycle boneyard and after about 20 minutes of their parts guy combing through about 4 shelves filled with racks and racks of carburetors he managed to fish out a set from a 1979 Suzuki GS 425!  I was excited with that news as they guy on the phone had told me that they only had a set for a GS 450 which probably would have worked but needed some tweaking so a direct replacement was a bonus!   Also included in the deal was a complete throttle cable that was not broken and moved within the sheathing a lot better than my original so that means I only need to find one more to have a completely functioning set with no defects.

Since the GS 425 is not a real sought after or in demand bike I got the carbs for a good price too.  These carbs were a lot worse off than my original ones though.  A lot dirtier and the slides were pretty much gummed up with varnish and did not want to move at all.

Rather than bore you with a whole bunch of pictures of carb internals again I didn’t take pictures of the cleaning process this time around.   This time around I avoided all the mistakes I made on the first set and everything went quite smoothly.  I made sure that all the passages flowed free and used a wire from a wire brush to clean out all the small nooks and crannies, set the float height at 26.6mm, set the A/F screws at 2 ½ turns out and bench-synched the carbs.
I ran into a few little mix-ups in the re-installation process, the first being the order of putting the carbs in VS. the cam chain tensioner.  The Clymer manual says that the cam chain tensioner needs to go in first and then the carbs.  I have found that I have a much easier time reattaching the throttle cables with the cam chain tensioner out.  The other thing that I ran into was that I flip flopped the lower bracket so when I tried to put the cam chain tensioner back in the lower bracket was impeding on the clearance with the tensioner so it tool a very short screw driver in order to flip the lower bracket without removing the entire carb assembly again.
After all the work I reinstalled the gas tank and rolled the bike out to driveway and prepared to try and start the bike.  First I turned on the choke at the carburetor and put the petcock to “PRI” and thumbed the starter button.  It started almost right away but was idling really high 3-4K so I turned the bike off and turned the choke off and put the petcock to “ON” and started the bike again with a screwdriver handy to adjust the idle speed screw.  I thumbed the starter again, this time the bike was idling around 2-3K and when I started turning the idle speed adjuster screw out the idle responded compliantly and eventually settled to around 1.5K this is the point where I shut it off and grabbed the video camera, taking the following video.


As I said in the video it was quite satisfying to have the bike running and idling (and in my opinion, well) after almost a year’s worth of work!  There is still a lot more to be done with the engine before I take it for a ride or even run it all that much but that will all be covered in future posts.  For now I am just going to bask in the first major hurdle in the project being cleared!  Thanks to everyone who reads and provides feedback it is greatly appreciated!

Thursday, July 14, 2011

Clean the Counter Shaft Sprocket Area and Cleans and Reinstall Chain


It's been a while since I've been able to get at the bike and do some work, I have been working on finding a cheap source for a set of replacement carbs, and brainstorming with my machinist buddy on the best way to remove the broken ez-out and in turn the broken off bolt.  In the mean time there have been a number of other obligations that have kept me from the bike.   Today I finally rolled the old girl out of the garage and decided that I had to get something done one look at the counter shaft area of the case and I had my target.  Yes that is an acorn in there who knows how that got in there!
Really there is no secret to cleaning up a greasy messy area I used some Brakleen and a screwdriver and an old towel and spent a good hour on cleaning up the mess.
Honestly while it looks a lot better it could stand to be even cleaner but with the engine still on the bike and all the parts installed I would consider this an acceptable level of cleanliness that will allow me to assess if there are any leaks, from the counter shaft the shift shaft or the clutch rod.
After that I decided to make an attempt at cleaning up the chain it was in a pretty rusty grimy state.
I used a brass wire brush and some WD-40 to clean it up and there are no kinks in the chain and all the rollers seem to be functioning. and for the time being it will serve the purpose of keeping the bike from rolling around when in gear and (hopefully) in the near future some shakedown rides.
I set the slack in the chain and that was pretty much it for the day.  I hope to be able to get more done in the next few weeks and have some more interesting updates for those who are following the project.  I appreciate the input and the encouragement and as always, thanks for reading!

Thursday, June 23, 2011

A Disappointing String of Setbacks


Last Sunday was not a good day for the Suzuki GS 425L project.  There weren’t any major setbacks but just little ones, some silly mistakes that If I had thought more about it before doing I would have never made in the first place.  Sometimes those are the most frustrating ones, when you don’t have anyone to blame but yourself.
The day started off with optimism; I had gotten the o-rings I needed for the carbs’ emulsifier tubes so I set about checking the putting the new o-rings on and reassembling the left carb and disassembling the right carb.  I was still amazed at how the littlest thing can bring a project to a stop.

After I disassembled the right carb I double checked all the passages for good flow and checked the gasket on the emulsifier tube on the right carb which did need to be replaced, good thing I ordered two.


Now here is where I make the first mistake, the starter feed tube and jet (circled below) came out pretty easily on the left carb but the right one was really hard to get out.


It turns out that there is a very good reason that it was hard to get out; THEY AREN’T SUPPOSED TO COME OUT!  Long story short, I damaged the starter feed tube and jet and now I will have to get a new carb or set of carbs since they don’t sell replacement starter feed tube and jets because THEY AREN’T SUPPOSED TO COME OUT!

What sucks about that is that they will inevitably have to be used carbs with will have to be went through and cleaned all over again.  These are the times in projects where you have to show some fortitude and keep pushing forward even though you are starting to feel a little beat down.  So, soldiering on I put the carbs aside again and decided that I would clean out the drive sprocket cover and try and use the EZ-Out I had bought to get some of the stuck bolts out from the engine case.

Some parts of a project aren’t; all that glamorous, this would be one of them, just a sticky, greasy, filthy mess.  I got the inside of the cover pretty well cleaned up and successfully  removed 2 of the three stuck bolts I was cruising and then BAM.

EZ-Out not so easy… at that point I was done for the day, I am not sure what the next step is going to be considering that not only is the bolt still stuck but there is now even harder tool steel stick in the middle of it.  I will have to call in a favor (which the quantity I have left are dwindling) from my machinist buddy to try and get that thing out.  That is the clutch cover bolt if you were wondering.
I’ll have some free time this weekend and more free time coming up over the next few weeks so hopefully I will have more steps forward to share next time around!
Thanks (as always) for reading!

Saturday, June 11, 2011

Front Fender Reinstalled New Seat Acquired


As I mentioned previously after getting the lower bars on the bike, the seat was becoming more and more of an eyesore, so this last Wednsday I went out to the local motorcycle salvage yard and found myself a new seat.  They had a large cache of old cycle seats up in a dimly lit attic in their “warehouse.”  After some searching I was able to find the above number and it was exactly what I had in mind!  I wanted one the long flat seats that some of the more sporting Suzukis of the period had.  This one as far as I can tell is off a Suzuki GT185, probably a 1975 model judging by the pictures I have looked at on the web, and while it wasn’t a requirement, the fact that it has the “Suzuki” on the back of the seat is pretty cool.

The seat itself was not labeled when I found it so all I knew for sure was that it was about the same size seat pan (I brought the old one with) and that the rubber mounts on the seat pan that ride on the frame rails were approximately the same place as the stock “king and queen” seat.
The mounts however were not the same, the hinges and the locking mechanism is mirrored in respect to the old seat so in the pictures the seat is just set on the frame so I could get an idea of what it will look like.

I will have to either take the mounting brackets off the stock seat (thus making the old seat useless) or make up some custom brackets to fit the new seat to mount it on the bike.  I am leaning towards the making up custom mounts for the new seat, even though I don’t see why anyone would want a “king and queen” seat maybe someone else could use it.
I did remove the grab bar and the turn signals off the back, the grab bar will most likely not go back on but I will have to make spacers the same thickness as the pint where the bar grab bar went to the shocks in the back as  I want to keep the rear shocks aligned.  The turn signals as well as the front ones are going to a friend’s place to have the stalks shortened.  The bike does seem a lot slimmer and a lot more sporting with the new seat which was the goal.

I couldn’t be happier with the seat purchase it didn’t look too pretty when it found it in the attic at the bone yard but a little Armor All and it looks practically brand new!
I also finally got the right bolts to put the front fender back on the bike.  It’s not the prettiest but with such skinny fork legs the forks need to be joined together for strength and stability.  As I spend more time with the bike I will think about how I want to trim the render as it doesn’t need to be so big.  I will probably take the bulk off of the front as that is not all that necessary, but I have to think about how much I want to leave on the rear.  I don’t want stuff being slung up from the road onto the engine.


The fender is a close fit for the tire, probably only 1/16 of an inch clearance, I will have to look into that and make adjustments if necessary for safety before it heads out on the road.
Speaking of heading out on the road, yesterday I finally got the replacement o-rings for the emulsifier tubes on the carbs so that project can be brought back to the front burner and after that I still have to clean up the chain and clean out the drive sprocket area and cover, as well as remove some stuck bolts for the drive sprocket cover!  I am 3 days into my 7 12 hour shifts in a row stint so it will be a bit before I get to any substantial work but there is lots to do so stay tuned, and thanks for reading!