Showing posts with label 1979 Suzuki GS425E Cafe Racer Bobber Chopper Rat Bike Race Bike Project. Show all posts

Sunday, October 7, 2012

2012-10-07 The Fall Crud Run


One of my goals for Oldbike this riding season was to put 1000 miles on it and be able to trust the bike out on the open road for long distances.  I’ve been using it pretty much exclusively for commuting around town and putting around the near outskirts of Madison but that had pretty much been the limits of my riding.  I was close to getting to the 1000 mile goal (75 to go) and the season is quickly coming to a close.  One of the events that marks the impending hibernation that our motorcycles must go into is the Fall Slimey Crud Café Racer Run.  The fall run is always the first Sunday in October, with a corresponding Spring Slimey Crud Café Racer Run that is on the first Sunday in May with the two rides meant to bookend the Wisconsin motorcycle riding season.  There is no official route for the run just a starting point of Pine Bluff, WI (most bikes part at The Red Mouse) and the ending point of Leland, WI (Most people parking along the road and across from Sprecher’s Bar).  Anyone who rides in the Alphabet Soup, (what moto-riders refer to the vast numbers of lettered county roads of southwest Wisconsin as) has their own favorite roads so why set limits on the routes.  It’s about a 100 mile trip if you take a fairly direct route.  So that filled the bill for me.  I have been wanting to take my Oldbike to the Crud Run since got it running this would be the day!


It was a cold day, I knew it was going to be a cold one so I didn’t even bother looking at the temperature, that true knowledge would not help motivate me.  My first layer was my Under Armor cold weather compression top and bottoms, and wool socks.  For the bottom the rest was simple just my riding pants and riding boots I figured the air cooled engine might do a little warming for my legs.  Up top was a different story I put on a long sleeve t-shirt a zip up fleece and a Carhartt vest and on top of all that I had my riding jacket and it’s zip in liner,  for my noggin the Scorpion EXO-1000 helmet and for the hands, my Burton snowboarding gloves.  This proved to be just about the right amount of insulation.  I made it to The Red Mouse in Pine Bluff at around 11:30am, a little late to see the peak attendance,   a lot of the people get there much earlier have coffee, breakfast and bullshit for a while with the bikes starting to leave en-masse around 11:00am.  By the time I had downed my coffee and wandered around looking at the bikes I was starting to feel a little warm so I decided it was time to head on up to Leland and cool off a bit.


I stopped by the Vietnam Veteran’s Memorial and snapped a picture of Oldbike there under it’s own power and looking in much better nick than it was the last time it was there.


Here is the picture I took of Oldbike on the day I picked it up in pretty much exactly the same place, just with a Menard's rental truck underneath it!  I thought it was good synchronicity to make a quick stop.


You might not be able to tell in the picture but that is the sign at Leland’s city limits.  I had made it there!  Oldbike rand good all the way up there holding sustained speeds between 60-70 miles per hour for the trip.  The only complaints I got were on some of the steeper hills where the little 423cc engine bogged a bit in top gear and again in fifth when I downshifted too slowly and lose even more forward momentum.


I may have topped off the oil a little too much before I left as I had some oil seeping from the 30+ year old valve cover gasket!


But really Oldbike was none the worse for wear after making the trip, I think it was happy to be amongst friends of a similar vintage.  I actually passed three other bikes of a similar age that looked about twice as pretty that had left their pilots stranded on the side of the road with unknown mechanical or electrical issues.  It did make me feel a little crazy but I trusted the work I had done on the bike and my trust was rewarded.


I bellied up to Sprecher’s Bar and choosing to circumvent Junior’s “Famous” salami sandwich in favor of a Sloppy Joe and some hot chocolate.  As I warmed myself inside I was amazed at how a place like this had managed to stay open for over 100 years, and felt buoyed the fact that the Slimey Crud Café Racer Run probably plays a big part in keeping this bar where you can drink a bourbon and buy a gun at the same time afloat throughout the rest of the year!


It’s definitely a point of pride for Junior the owner and he updates the newspaper clipping with new peak attendance records when pertinent!  You can see the web version of this article if you follow this link.


Having filled my eyes with enough vintage goodness for the day, pointed Oldbike back home and on my back through Sauk City I rolled over the 21000 mile mark accomplishing another goal for the year!  We can probably count on our two hands how many truly good riding days that there are left before the riding season is truly over and on one hand, the good days that we will actually be free to ride.  Looking ahead towards the off-season I’ve got plans to rebuild the front brake and get new pads and shoes all around.  I plan on removing and inspecting the forks cleaning the internals and replacing fork seals if necessary.  I’ll be learning about swingarm bushings and working to enhance the swingarm pivot and inspecting the rear shocks and assessing their performance/condition.  New tires are on part of the plan too and of course a tear-down and inspection of the engine and it’s internals is on tap too.  So stay tuned and I’ll try my best to keep myself and you entertained with more Oldbike goodness!

As always, thanks for reading!

One more post script Return of the Cafe Racers has a little write up I'd like to share about the Slimey Crud Café Racer Run.  If you want to learn more make sure you look at the other hyper-linked test throughout the post there's some good stuff in there!

Wednesday, March 16, 2011

Headlights, Throttle Cables and Mirror Stalks


As I discussed earlier, I wanted to try and sew up the headlight portion of the project in my next installment of the blog.  Also, I wanted to try JB Weld the throttle cables which were broken on the plastic tubes coming out of the right hand controls.  Another little thing that I did was basically chopping off the mirror that was JB Welded into place by the previous owner in a manner that made the mirror completely ineffective, and then chopping off the nub of a mirror that had also been JB welded into place and then broken off at some point.

The first step in the cleaning up of the headlight housing was to clean up the rust.  To accomplish this I used a Black & Decker 3" fine wire wheel mounted to a drill.


This did a pretty good job as you can see in the below picture which I took mid process.


In the picture below you can see the masking job I did on the outside of the headlight housing.


Here is a shot of the Primer coat on the inside of the headlight assembly.


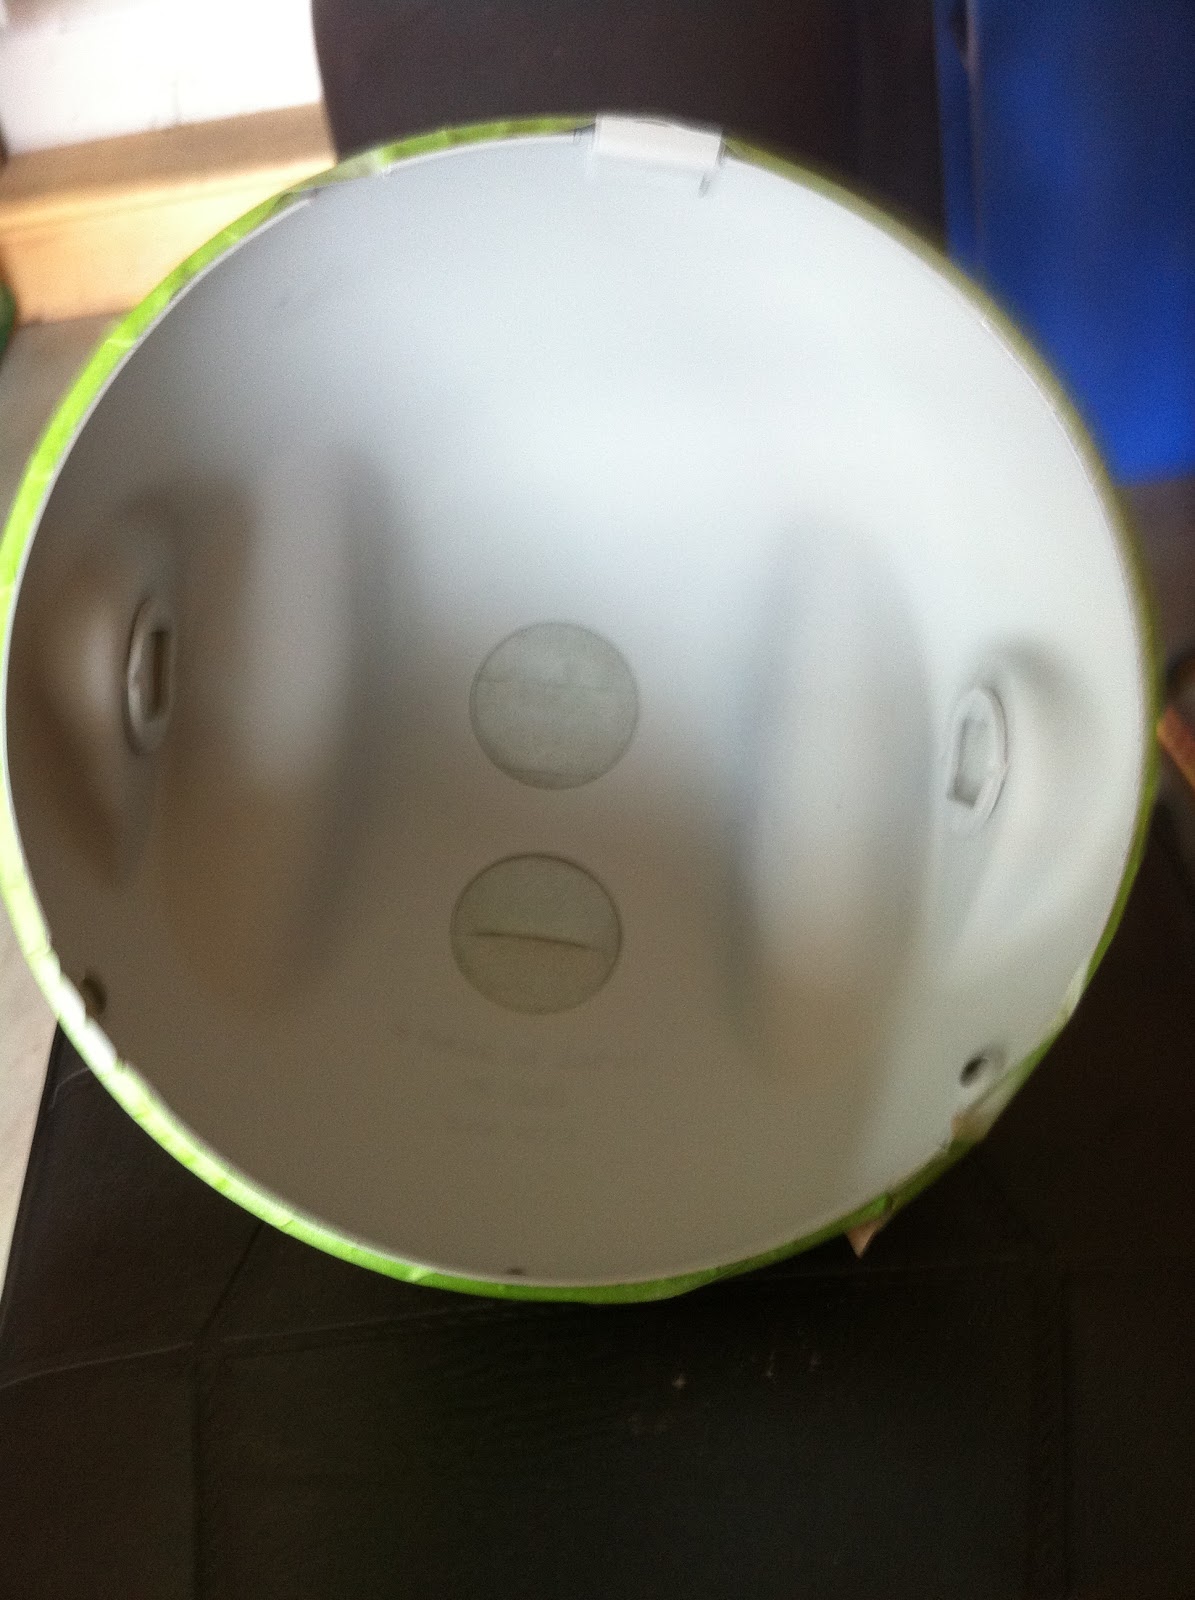
After that dried I applied the coats of gloss "canvas white" to the inside of the housing.


The next thing that I wanted to address is the issue with the throttle cables.  As you can see in the picture below, the plastic has broken where the threading to adjust the tension on the throttle cables goes into.

This has been causing issues with my ability to be able to finess the throttle when I have been trying to start the bike.  The throttle response is sluggish and also sometimes sticks.  The trick with JB Welding these was going to be to not have the stuff squeeze into the tube and then "weld" the cable into place.  It was worth the risk, as I was getting nowhere with getting the bike to idle properly without good cables and the set would be $60-ish for the set from Suzuki if I needed to buy new ones.  So with nothing to lose I figured I'd give it a try.

The first step, which I didn’t get a picture of was to get enough of a bead on the broken end to hold it together and not squeeze in.  I let that se overnight and then in the morning once it was holding pretty well, I coated the whole exterior with more JB Weld.  If you look carefully at the picture you can see the raised area where the initial bead was under the JB Weld coating.


The good news is that throughout the process I managed to have no interference of JB Weld with the cable so they still slide freely!  I might look into the proper way to lube them if possible to the to help them slide even better!  The true test will be once I get them mounted back on the bike and see how they hold up (stay tuned for that).

Here is another thing that has always annoyed me about the bike.  This rearview mirror on the left was JB Welded into place by the previous owner and the way it is set you can’t even adjust it to see behind you!  I can tell the same thing had happened on the right hand side too but that one had broken off already.


Even if I could have removed the mirror, which I couldn’t, they aren’t to my taste so I hack sawed them flush with the controls and filed the smooth on both sides.  In the pictures you can see what had happened.  The original mirrors must have stripped out and it looks like they drilled out the holes filled them with JB Weld and then stuck the mirrors in the holes.  I’m not sure that I will use those mounting points in the long run but if I do I will consult my machinist friend and we will do it the right way.  On a side note, the irony that I am bitching about someone’s use of JB Weld when I have used it in my last two blog updates is not lost on me!


I did identify one thing that I might have swayed my direction on what will be hapening with this bike.  This bike has a 19" front wheel and an 18" rear wheel which I still have to confirm but I am pretty sure that means I have a 1979 Suzuki GS425L not an "E."  The "L" was a chopper wannabe and I have to see what the differences are in the chassis but it there is a huge difference that swings it away from being a sporting prospect, I may be going in a bobber direction or perhaps just a refresh and keeps stock mindset instead of a cafe racer direction.  Kind of sad, but I think if in the end I am able to keep an old bike on the road everyone wins!
That's about the extent of what I accomplised before I delve into my work week (Thursday - Sunday this week) but I should mention a couple of great things that happened this week as well not specifically related to the bike
1. I was able to work on the bike at night with the garage door open for the first time this year!

2. I took the SV650s for its first ride of the year today!  Awesome!


Till next time everyone take care!

Friday, March 11, 2011

A Little Less Cobbly In the Headlight Department

One of the nit-picky things that I identified early on about the bike was the way a non-stock headlight was unceremoniously stuck onto the back of a stock headlight bulk with what appeared to be caulk.

After talking to a local shop owner that has owned 3 of these bikes over the years he informed me that this was not an uncommon practice, as the price of the OEM replacement bulbs went north of $50 and the cost of a halogen bulb with the matching plug was only $7.  Still I didn’t want to accept that I would have to glue a light bulb in whenever I needed to change one.  Check out what I came up with in the video below.


You can see in the detail picture below that the washers, once the washer with the 1” inside diameter is JB Welded onto the headlight bucket, will clamp the headlight bulb into the headlight assembly.  You can also see that the bolts are too long and will have to be ground down (more on that in a bit).

The smaller washer is a 7/8" inside diameter.


Just a small bead of JB Weld is all that is needed.  I took a file to the area where the JB Weld was going to be applied.


After I had the washer positioned where I wanted it, JB Weld’s instructions recommend that you let it cure for 24 hours so that is what I did.

The next day I took the assembly to a friend’s garage to grind down the bolts and do a final assembly.  A growler of Ale Asylum’s “Madtown Nutbrown” was along for the ride as well!


When I was grinding down the bolts I put the head in a vise grip and took it to the bench grinder.  The first one didn’t do so hot!

The rest turned out okay, but I think I might go with some socket head cap screws instead that are bought at the right length in the long run.  The final assembly looks like this.


All in all I am pretty happy with the progress on the headlight, there is till the issue of the rust on the inside of the headlight assembly, that might be the next project so I can close the chapter on the headlight altogether.

Monday, March 7, 2011

It Wants to Be A Good Bike… I Can Tell!!!

So it’s been a long time since I posted an update but life kept me out of the garage for a good amount of time in this new year.  First was our 2 week honeymoon which was an amazing time, and after that I had to throw myself into my NERC Reliability Coordinator certification studies. Which I passed, if you were wondering…
But now that the studying is done and I am steeling into my new job and the responsibilities that come with it, I see a fair amount of wrench time in my future!  The first thing that I decided to do once I got back into the garage was to lose the leather Harley grips, they have no place on a bike of mine.  The will be replaced with some spider grips that I had lying around.

After that I started to run down the real cause of the starter button gremlins on the GS.  I disassembled the right hand controls to see if there was anything wrong in there and discovered that when the previous owner installed the grips, he must have  routed the wires the wrong way around the bar causing some stress in the wires going to the run/stop switch.  The solder connections were showing a few cracks (but not disconnected) so I re-soldered them anyhow to be safe.

I took the opportunity to disassemble the thumb switch and clean the contacts on the switch itself in case that was causing it to not start.  Unfortunately these repairs did not have the results I was hoping for and the bike still would not start with the starter button.

I moved on to the clutch safety switch on the opposite handlebar to see if something was amiss.  I wish I would have take some pictures of the work I did on that side but I was so caught up in the work I forgot to.  I will try and draw up a diagram of what I found in case someone else is having the same problem.  Basically the clutch safety switch is there to make sure that the rider holds the clutch lever in while starting the bike to avoid someone lurching forward when they thumb the starter and the bike is in gear.  So you grab the clutch and the switch slides into position closing the contacts and allowing current to flow to the starter solenoid and conversely the starter.  When I disassembled mine I could see that someone had cobbled in a non factory clutch lever that did not slide the clutch safety switch when you squeezed the lever.  So for now perhaps for good I have soldered in a jumper to connect the two clutch safety switch leads permanently and that fixed the problem with the thumb starter switch! The clutch safety switch is pretty much an idiot protective device anyhow.  If you don’t know to have your bike in neutral or have the clutch in when you start your bike you deserve to be bucked off it if you ask me!
So after I got the starter switch fixed I figured it would be a good time to try an start the bike.  You can see how that goes in the video below.
That’s it for now, I have another post in the works now relating to the headlight assembly and a little less cobbly-a-way to hold my headlight bulb in place and I’ll try and get a diagram of the clutch starter assembly or maybe I’ll just take it apart again and take some pictures!

Thanks for reading!

Sunday, January 9, 2011

The GS Rustles from Its Slumber, Roars, then Goes Back to Sleep


Friday I finally had some time to dedicate to the GS425E Project.  My plan for the day was to get the carburetors back on the bike, and empty the gas tank of the bad gas, put the gas tank back on, get some new gas into the tank and see if it would start.  Getting the carbs back in took up the bulk of the time as it is just a tight squeeze and reconnecting the throttle cables is never as easy as disconnecting them.  To ease the process I decided that once again I’d take out the cam chain tensioner to give myself some more clearance.  Once I got the carbs back in and the throttle cables back on it was a lot more difficult to put the three bolts that hold the cam chain tensioner back on because it was so tight but eventually I got them to a point where I was snugging them up and apparently I torqued the lower one a little too much and SNAP!  There went the bolt I always thought the old adage, “tighten it up till it loosens and then back it of a quarter turn,” was funny until it happened to me.

Undeterred, I decided that I would push on and see if I couldn’t get it to start anyhow.  So I disposed of the bad gas in the “most environmentally friendly” way available to me and reinstalled the tank and put in about a half gallon of fresh gas.  When I started working I had thrown the battery on the charger and when I got to a point where I wanted to start the bike it wasn’t fully charged but I figured I’d give it a go.
It didn’t go well so I decided to regroup and fully charge the battery and give it another shot on Saturday.  Saturday never happened as I was really sick so fast forward to Sunday and I went out to give it another go with the fully charged battery.


As you can see I did get the bike to start and run for a bit but by then it was getting really cold and I wasn’t really over my sickness all the way so I figured that was enough for the day.  A few things I noticed while attempting to start the bike:
1.       The battery turned over much faster when connected to the Buick on the jumper cables. Ne Battery?
2.       The “fancy” grips don’t return to the closed position because they weren’t meant for the bike (That is why the bike was racing when it started).
3.       I might need new throttle cables too.
4.       I might have to ask some people and see if it is bad to be running the starter for such long intervals.
5.       I may need to adjust the idle screw in order to keep the bike running with the throttle closed.
So there are some things to work on for the next installment which will probably be over the next weekend unless I find some time one of these weeknights to try some different things.  I should be studying for a work related task at home so if you see an update that means I’ve been slacking off.

Friday, December 10, 2010

I Sure Could Use Some Sparks


No, not my one of my favorite caffeinated alcoholic beverages, though they are quite tasty.  In between clearing away the snow and ice from the driveways and sidewalks today and vacuuming the floors in the house I took some of my day off to test for spark on the GS.


In another positive development both spark plugs were producing spark.  I want to make sure that the petcock on the gas tank is not clogged so I will disassemble that clean it as best I can.  I will also get some new hoses and once that is done that and the carbs already clean there should be no reason that the engine shouldn't fire.  There will be fuel and spark so there should then be fire.  Hopefully I can make some progress to that end over the weekend.

We are supposed to get 4-6 inches of snow tomorrow so hopefully I wound have to spend the entire day clearing snow :-(

On an unrelated note here is a video of me firing up the 2002 SV650s that normally sits silently in the background in most of my pictures and videos.